

Create and confirm a sales order
Create a sales order as a draft, add its lines, and confirm it so it can be picked, packed, shipped, and invoiced.
Before you start
- You need permission to view sales orders (
sales.order.read) and to create them (sales.order.create). - You need a customer for the order and the items you want to sell. If the customer does not exist yet, add them first (see “Add a customer”).
Steps
-
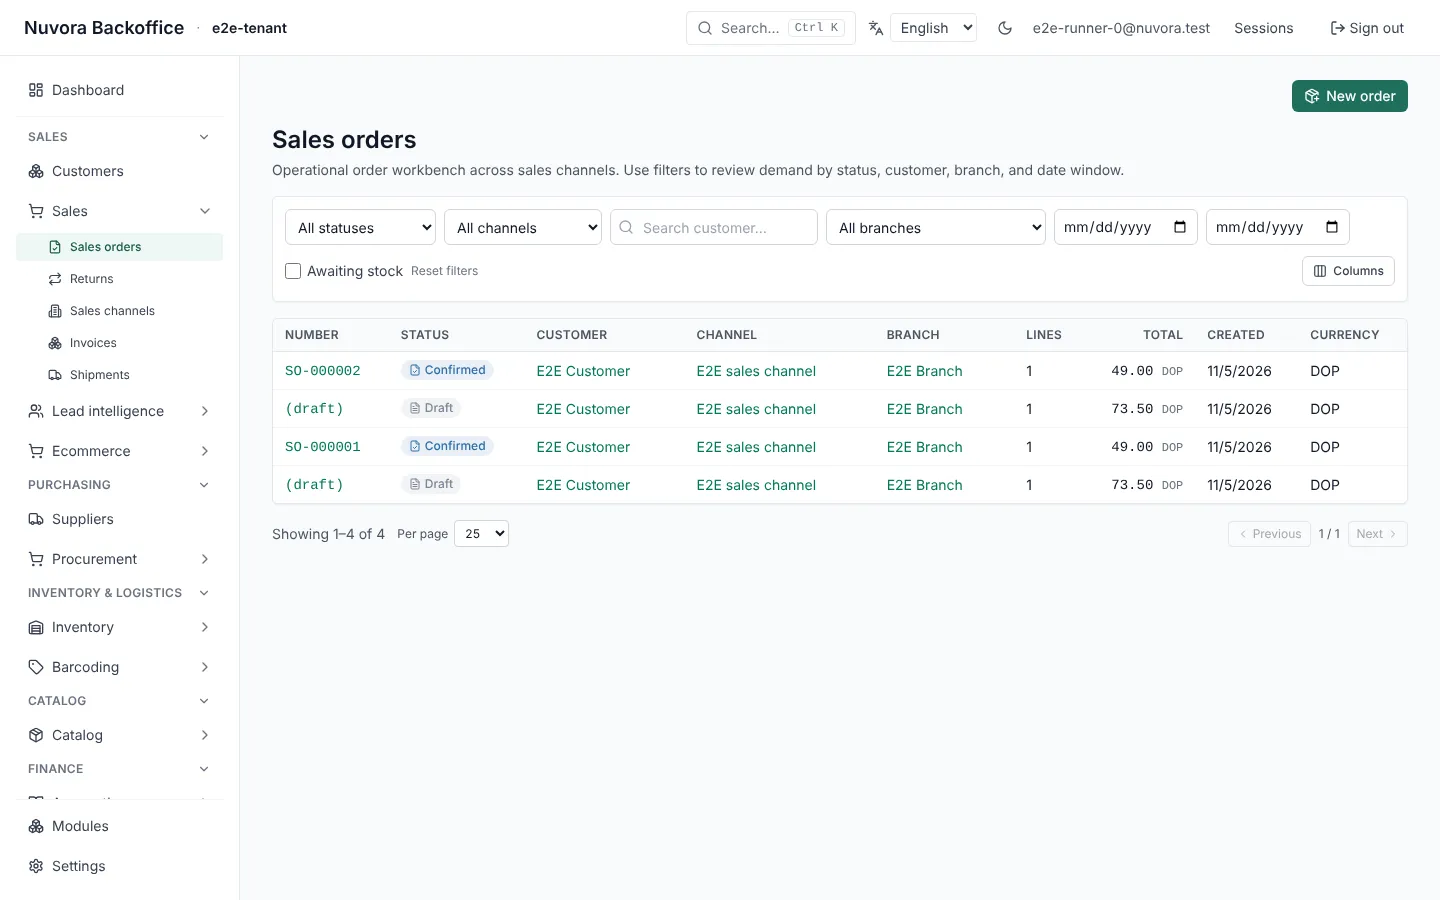
Open Sales orders and select New order.
-
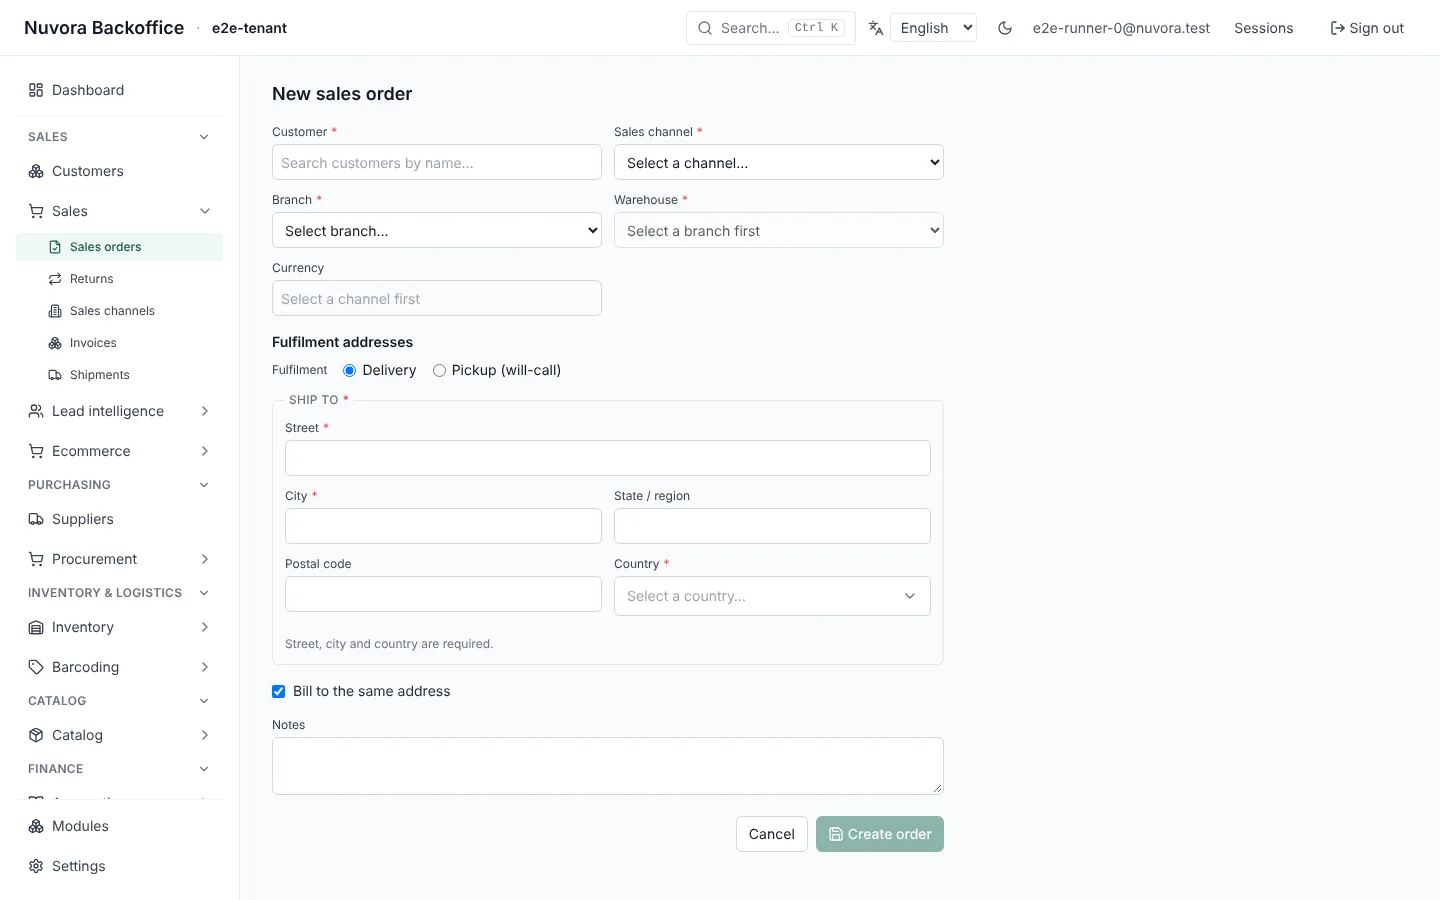
Fill in the form: Customer, Sales channel, Branch, Warehouse, and Currency. Choose a sales channel first — the currency list stays empty until then. Under Fulfilment addresses, choose Delivery or Pickup (will-call) and fill in Ship to and Bill to (or select Bill to the same address). Add any Notes.
-
Select Create order. The order is created as a Draft and has no number yet — it gets one when you confirm it.
-
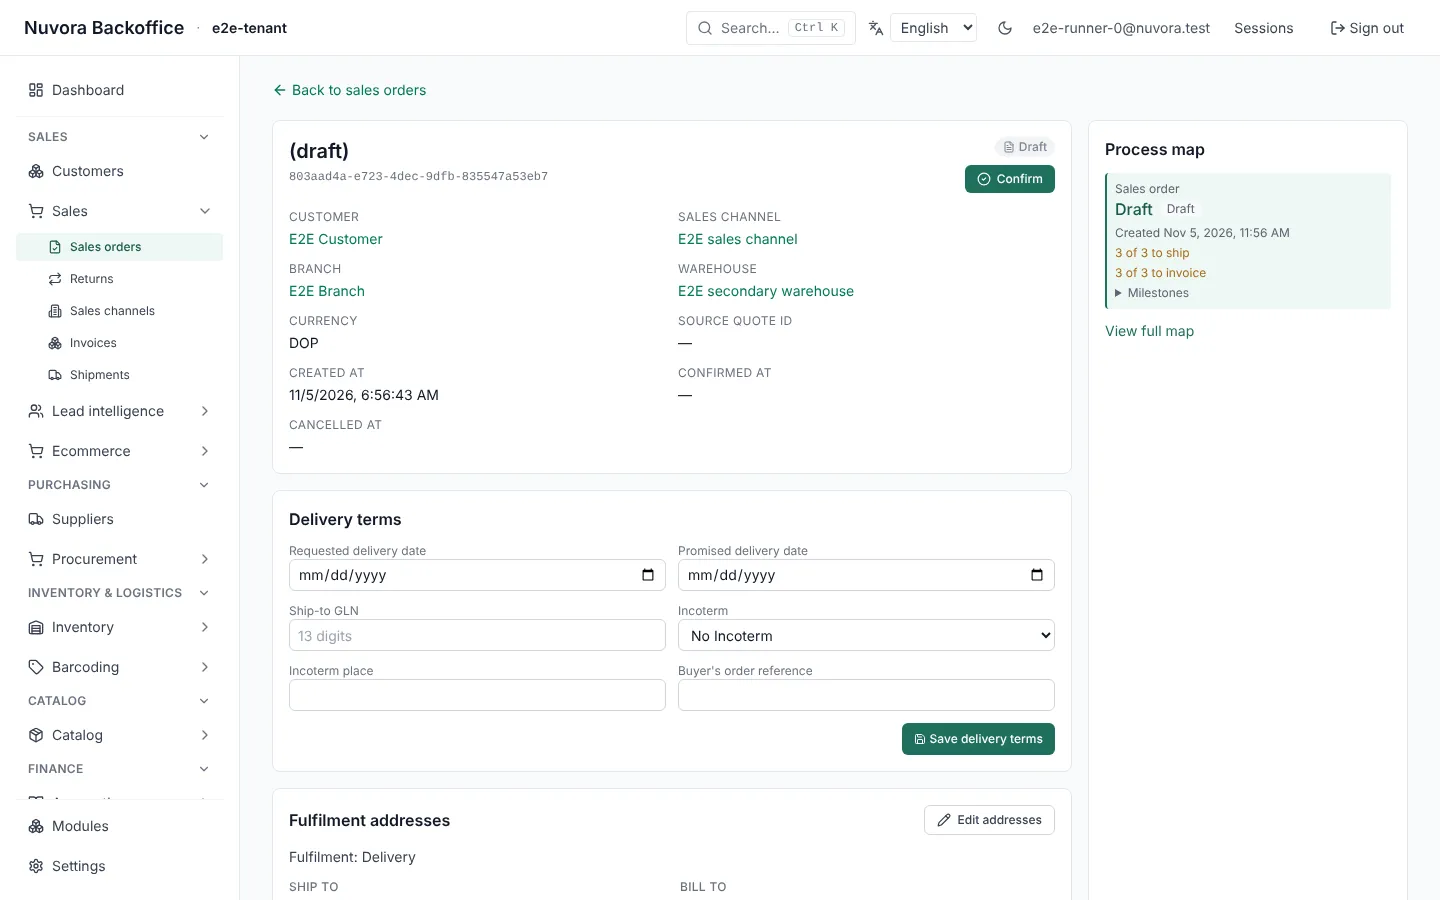
Add lines: fill in the Item, Quantity, Unit, and Discount %, then select Add line. You can add or remove lines only while the order is a draft.
-
Select Confirm. Confirm appears only for a draft with at least one line.
What happens next
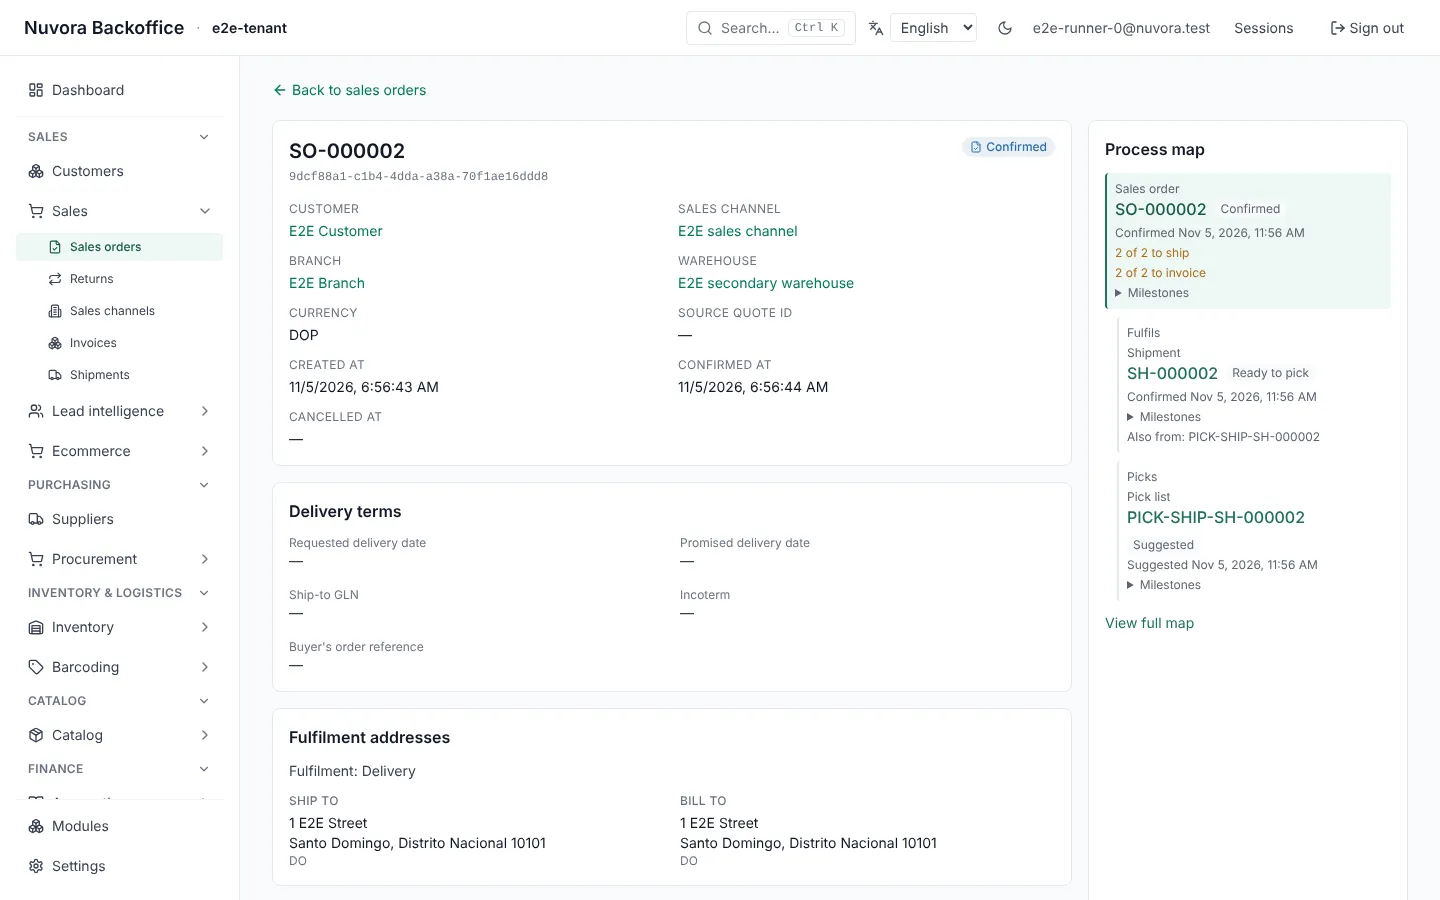
- The confirmed order shows its traceability view, with the shipment and the pick list created by confirming.
- While something is left to ship, Create shipment appears on the order.
- If an approval rule applies, confirming does not confirm the order at once: it shows an Approval pending banner — “This order is waiting for approval: {state}.” Approval itself is a separate article.
- If the order is waiting for a manual payment, it shows “Awaiting payment confirmation until {deadline}. Nothing ships or invoices until staff confirm the payment.”
Related
- Add a customer (S-1)
- Pick, pack and ship an order (S-4)
- Invoice an order (S-5)